Last Updated on: 19th February 2024, 06:05 pm
Videos are a way of capturing moments of our lives. We don’t take them only for ourselves, but also for our friends, and families. To help people share their lives with their friends and families, different social networks and platforms promote the use of videos from various devices. Thanks to that, people can now share their lives in high definition with their peers.
However, your videos will need to fulfill some specific criteria to maintain the video quality. Surely, you don’t want to share a blurry video where people can’t even recognize you.
To do that, you’ll need to adjust its resolution, bitrate, and frame rate and reduce the video’s size without ruining the quality. That’s why there are different converting software to help you do that.
Today, we’re going to show you how to compress videos for Facebook, Instagram, and Vimeo by Wondershare Uniconverter.
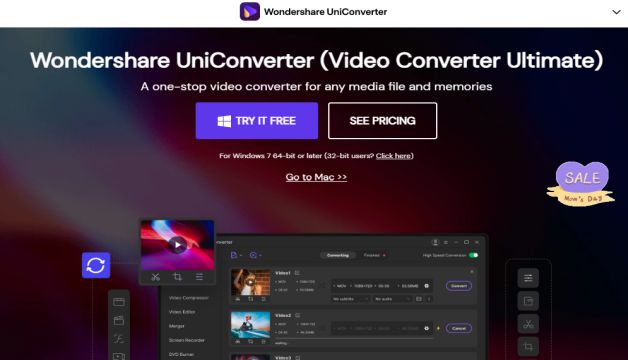
Wondershare Uniconverter is a powerful video tool with many exciting features. Originally known as Wondershare Video Converter Ultimate, it is the ultimate video utility.
It can function as a video compression tool and as a video editor, video file converter, DVD burner, and many more.
The Wondershare Uniconverter can compress videos for Vimeo and allows Facebook and Instagram video compression.
And here we’re going to show you how you can compress a video file for Facebook, Instagram, and Vimeo with the ultimate video tool.
Open Uniconverter and Add Videos
First, you’ll have to download the Wondershare Uniconverter. After you’ve downloaded the setup file, install the program on your computer.
Once you’ve installed and registered the video tool, open the application file.
You’ll see a few options on the control panel on the left side. Click on the Video Compressor option. Now you can add video files to compress their sizes.
You can either click on the add videos from the software by browsing them. You can also add videos by dragging them over to the program.
If you’re adding the video files by browning them, click on the Add or drag files here to start compression in the middle of the screen. You can also click on the Add Files button on the left-top corner of the panel. Then the program will ask you for the file’s location.
Once you’ve located the file, select the file and click on the Open button. Or you can simply access your hard drive and click and drag the video file on the said button.
Choose the Output Format
Once you’ve added the video file to the list, locate the Setting option. You can find it on the right-top corner of the main interface. Click on the Video tab. You’ll see a list of the names of different social media. Click on the social media name that you want to upload the video.
Let’s say you want to upload your video to Vimeo. Click on the Vimeo tab. You’ll see a flyout menu. The flyout menu will show you the supported video options on that particular social media, which in this case is Vimeo. Select your preferred choice.
If you’re confused about what format you should choose, the ideal file formats for compressing videos for Facebook, Instagram, and Vimeo are MOV and MP4.
Customize Compression Settings
Now that you’ve selected the output file format, you have to choose the parameters of the output file format. Make sure to stick to the specifications of the online media on which you want to upload the video.
Locate the Compression icon on the target bar and click on it. Here, you can change the compression settings. The first thing you can do is set a custom file size of the output video file. It’s a handy tool if you have a predetermined file size in mind.
Initially, the converter will automatically customize all the other options once you change the file size. But don’t worry. You can customize the other parameters yourself.
These parameters include the file format, bit rate, and resolution. Once you’ve customized the parameters, the converter will show you the predicted quality of the output file.
If you set the file size to be less than two megabytes, with a low resolution and bit rate, the converter will show that the output video will have low quality. Now that you’ve changed the settings click on the OK button to save the settings. And if you want to get rid of the settings, click on the Reset button.
Here’s How to Make Money on YouTube in 2024.
Start the Compression Process
Before you move on to the final step, make sure to check if the output video file will be to your liking. You can check the quality of the video by clicking on the Preview button on the settings panel. It will show you a 20-second clip of the edited version.
If everything is to your liking, you can move on to the final phase of the process, the compression process. If you want to compress any specific video, you’ll notice a Compress button on the right side of each video. Click on it to start the compression process of that particular video.
If you’ve uploaded more than one video and want to compress all of them at the same time, locate the Start All button at the bottom-right corner of the user interface. Click on it to start the process.
If you want, you can also speed up the compression process. You’ll see the High-Speed Conversion icon at the top-right corner of the interface. You can activate it to speed up the process.
Once the process is complete, the program will show a success sign. To check out the converted videos, click on the Finished tab. You’ll see the list of compressed video files with your customized settings.
Here’s How to Do Social Media Marketing (5 Essential Tips for Beginners)
Final Thoughts
Now that we’ve reached the end of the article, you should know how to compress videos for Facebook, Instagram, and Vimeo by Wondershare Uniconverter.
This application is really easy to use, and by following the guidelines we provided, you can easily upload high-definition videos to your social media.

Researcher, Blogger, Content Writer, Online Marketing Expert, Aptitude Test & Admissions Expert, Career Counselor.
PEC REGISTERED. ENGINEER. (NED University of Engineering & Technology)
CEO / Founder (The Educationist Hub)


Leave a Reply